Thursday, June 9, 2016

Final Project Blog Post

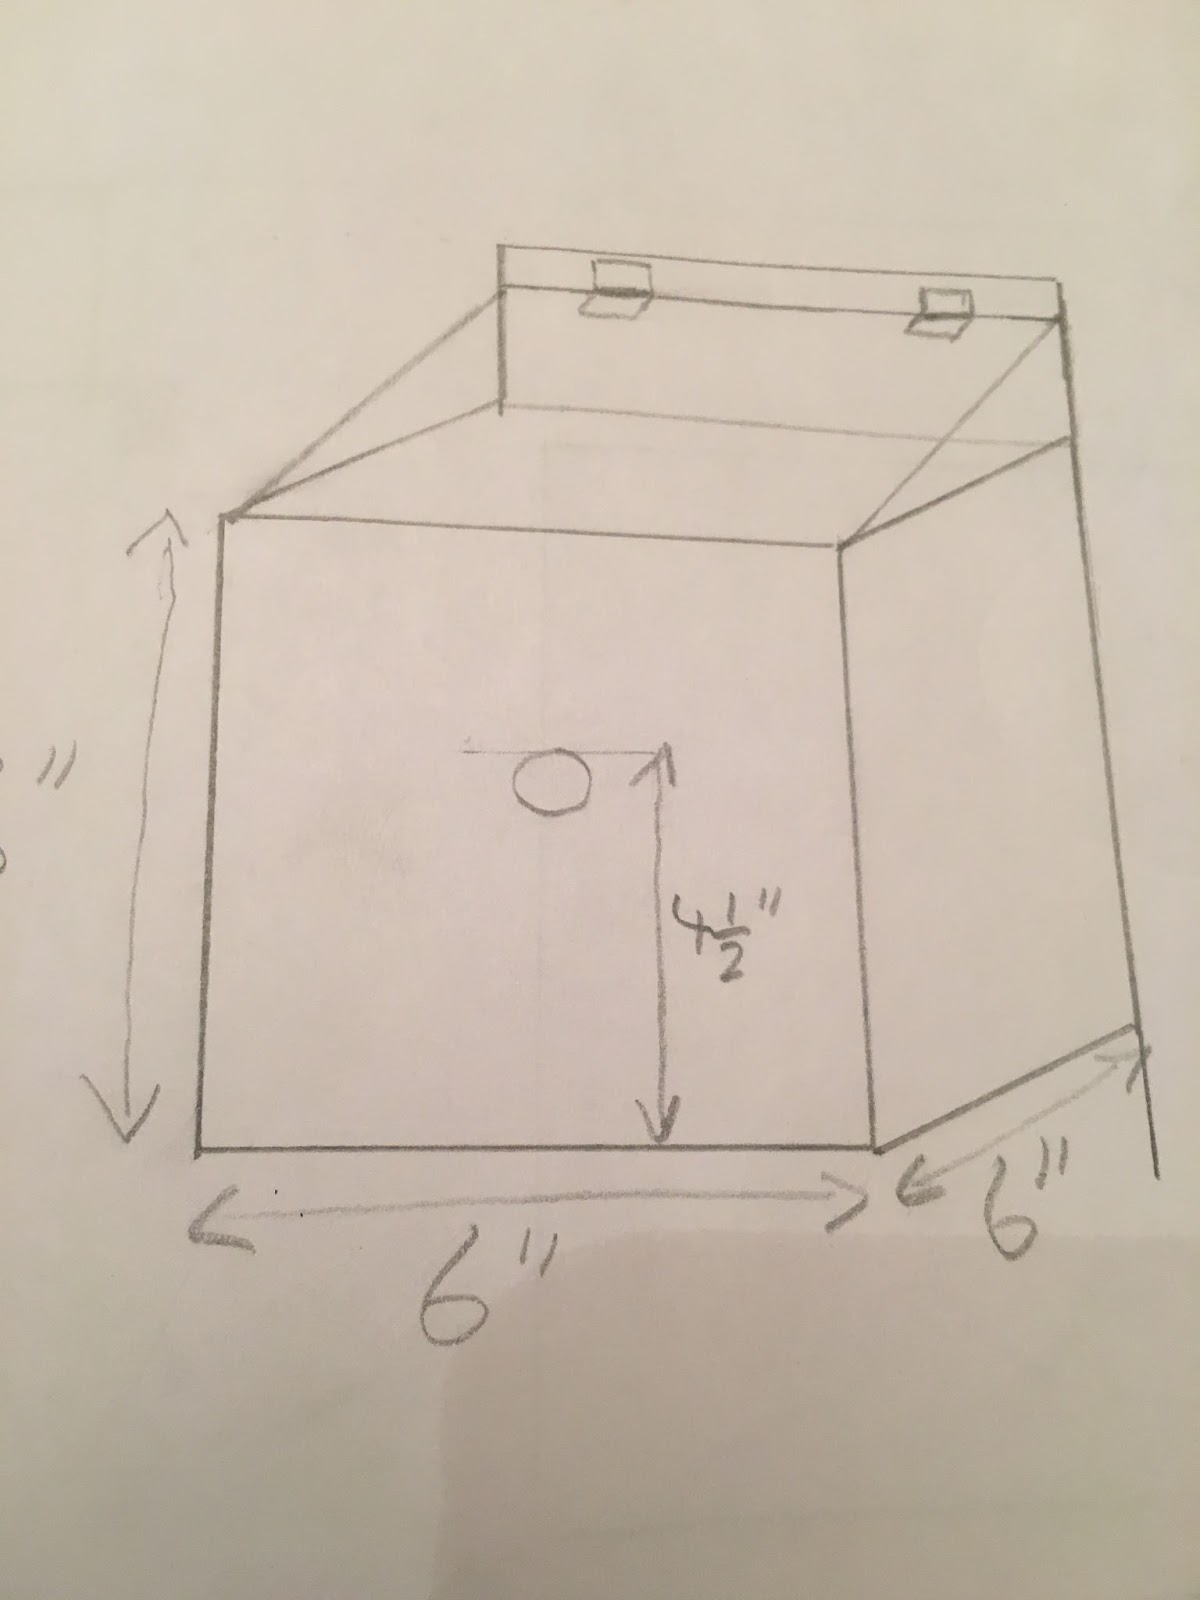
      After three weeks of working on it, my birdhouse if finally finished. It is made out of cedar wood, because cedar is water and decay resistant. There is a hole to allow the birds to get in and out, and a perch sticking out from under the hole that the birds can sit on. There is a roof attached to a hinge, so that it can be lifted up and down for cleaning and whatever other reason you would have to do that. There are also four holes drilled into the bottom and two openings on either side between the wall and the roof to allow for ventilation and drainage, so that it doesn't become too hot and the birds don't suffocate. I am pretty happy with how the project turned out, I think it looks good and it is ready to be put in my yard for everyone (including the birds) to admire.


Tuesday, May 17, 2016

Final Project in Progress Blog Post

    So far, this project is going very well. I have all of my sketches drawn out, and I have done a lot of research on birdhouses and the different types of birds that use them. Using this information that I collected, I was able to pick dimensions for the birdhouse, as well as a material (cedar wood), and I knew exactly what I would need to build it. Using this information, I was able to draw a few sketches showing what the birdhouse will look and the dimensions of it, which is useful because I can visualize it a lot easier using these sketches. The next step is to mill down the wood and turn it into usable planks, and glue these planks together to turn them into usable chunks. I will then start constructing the birdhouse with these pieces of wood, and the finished product should look something like the sketches below.


Sunday, December 6, 2015

Fruit and Cloth Acrylic Study


          Overall, I am not too happy with how this project turned out. Although it was my first time trying to use the subtractive colors to make shadows, it did not come out all that well. The colors that are supposed to make the shadows do not show up very well. Also, the edges between the areas where I put the original colors and where I did not are very sharp edges, not smooth, gradual light and shade. I could have done a better job on this project, but it was hard to do and make it look good, and I didn't really figure it out.

Tuesday, October 27, 2015

Acrylic Paint Shoe Drawing


            The biggest challenge I had was getting used to using paint versus charcoal and graphite. I think that I probably could have added a little more light and shade into the painting. I myself kind of like the background, the different colors. Two areas of the shoe that could be improved are the laces and the hole where the foot goes.

How to Draw a Square-Based Pyramid

Displaying 20151022_090808.jpg


Step 1: Draw a Square(in perspective)
Step 2: Find the midpoint and draw a vertical line up from that point
Step 3: Connect the corners to the tip of the vertical line
Step 4: Erase and Darken lines accordingly

Thursday, October 15, 2015

Light & Shade Studies


I am happy with how both of the drawings came out, more so the top one. I learned a lot about how light and shade works in this project. I look forward to using these techniques in later drawings.

Line Drawing


Gunti Bolts


I am pretty happy with how the drawing turned out. I think the darkened wood grain under the bolts to make it look like a shadow worked well. If I could have done something differently, I would have planned a little more on my test paper.